Overview:-
Why Goechala Is The Best Trek In India For Big Mountains Views
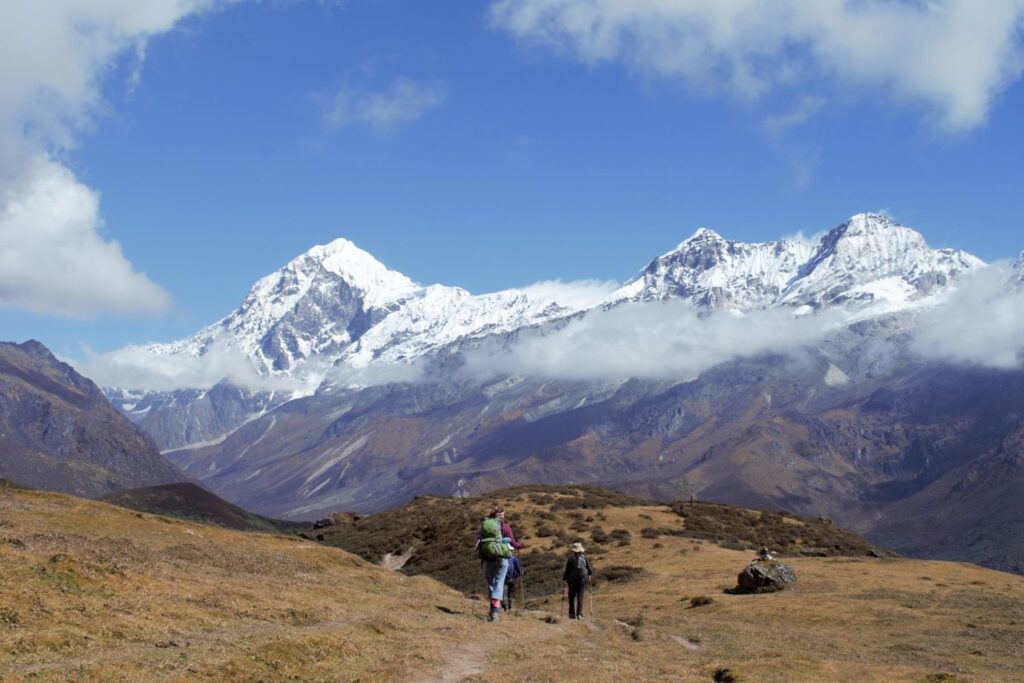
The biggest reason to do the Goechala trek is the grand views of big mountains that you see. You don’t just see one summit — the Kanchenjunga — but 14 other big summits. That’s a lot for any trek — especially as close to the eyes as on the Goechala trek. It is no wonder that trekkers consider Goechala to be the closest to the big mountain treks of Nepal.
Sunrise on the Kanchenjunga Range
One of the biggest highlights of the Goechala trek is the sunrise seen on the Kanchenjunga range. Even though trekkers are not allowed all the way to the actual Goecha Pass, the view from View Point 1 and Dzongri is worth an arm and a leg!
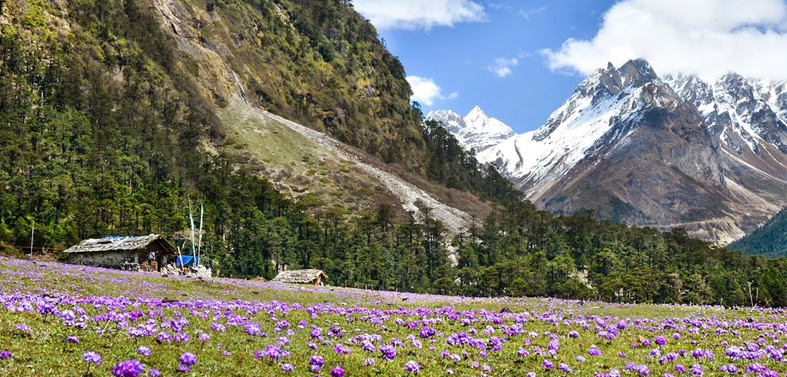
Rhododendrons in March and April
The trail to Goechala is blessed with rhododendron forests. And come spring months of March and April, they burst to life with pink and red flowers! It’s an enormously pleasing walk through the wooden-log trails of these jungles!
The Samiti Lake
The Samiti Lake is another big attraction on the Goechala trek. The view of the still waters, and the reflection of Mt Pandim in the lake, especially in the early hours, is a visual treat.
Itinary:-
The Trek
Day 1: Reach Yuksom
- Altitude: 5,643 ft (1,720 m)
- Time taken: 6-8 hours drive from New Jalpaiguri
The Goechala trek starts at Yuksom, a fairly large settlement in West Sikkim. It was once the capital of Sikkim – this shows in the culture of the town.
There are two things that you need to do at Yuksom before the trek begins. One, make an entry at the police station. For this you need a photo identity proof with three photo copies. Two, you need to pay the permit fees at the forest check post (trekkers do this in the morning when they are starting the trek). The fee to be paid is broken down into small elements like tent, porter, yak and other charges. Camera charges are extra. It can get somewhat confusing, but the net amount will boil down to about Rs 700 per person. Your Trek Leader will help you with this.
If you’re a foreigner, different rules apply. The details are mentioned at the end of this page.
Day 2: Yuksom to Sachen/Bhakim
- Altitude: 5,643 ft (1,720 m) to 7,200 feet (2,195 m)/8,654 ft (2,638 m)
- Time taken: 5-5.5 hours; 8-9 hours if Bhakim
- Trek gradient: Moderate-difficult. Gradual climb for 2.5 hours after which the trail becomes steeper up to Sachen. 45 minutes of level walk followed by a descent to a bridge leads to a trail that ascends steeply to reach Bhakim.
- Water sources: Carry 2 litres of water from Yuksom. You will cross streams intermittently where you can refill your water bottles.
The trail, though passing through the fringes of the forest is exposed for about half hour. Midway through the exposed trail, look for a shelter on your right. From here onwards it is half hour to the first bridge over the Pha Khola.By the time the trail gets to Pha Khola, you are well into the thick of the forest and the coolness envelopes you at all times. The gently undulating trail climbs gradually.
The next hour and half is a pleasant walk through the moist jungle until suddenly on your left the Tshushay Khola falls in a series of mini waterfalls joining the Prek below. 50 meters later a large iron bridge spans the Tshushay Khola. After the bridge the trail begins to climb more noticeably.
An hour later, watch for another small cement bridge over the Mentogang Khola (you won’t find a board telling you the name). You are already at 7,100 feet and it is only twenty minutes from here to the log hut of Sachen.
Sachen at 7,200 feet is a small clearing where a single log hut and a shelter on the trail exist. The log hut a few meters below the trail. The hut has room enough for about 6-7 and a small area to cook. For a larger team, look for the clearing just above the trail opposite the shelter. The Prek, runs below campsite and is not visible to the eye, though you can hear it faintly rushing below.
Day 3: Bhakim to Tshoka
- Altitude: 8,654 ft (2,638 m) to 9,701 ft (2,957 m)
- Time taken: 3-4 hours; 5-5.5 hours if you start from Sachen
- Trek gradient: Moderate. Initial 40 minutes of ascent from Bhakim in a series of long switchbacks after which the trail eases off into a gradual climb.
- Water sources: Carry sufficient water from Bhakim/Sachen
Take the trail that begins to climb to the left of the bridge. The trail climbs sharp through a mixed oak forest until the wide switchbacks level somewhat half hour later at the sight of the first rhododendrons. The altitude gain is rapid and the air gets cooler perceptively. Soon the trail climbs to the ridge and stays there until you get to Bhakim another half hour later. From the Prek, it takes an hour to get to Bhakim. The total distance is only a kilometer but feels a lot longer.
Bhakim has a Forest Rest House and some trekkers like staying at Bakhim – simply for its view of the Yuksom valley. Finding the caretaker is a struggle and most trekkers move on to Tshoka which is another hour away.
Bhakim has a lovely tea stall where the owner dishes out some snacks as well. With a well deserved rest, start your climb to Tshoka. Follow the trail just behind the Forest Rest House. The trail again climbs in a series of long switchbacks, overlooking Bhakim until forty minutes later it dives around a ridge to move to the other side of the hill.
At over 9,000 feet high, rhododendron trees abound everywhere. The trail gets dark from the overhanging trees and meanders for another ten minutes. It suddenly pops out to a plateau and the trekkers hut of Tshoka. There’s also a flat camping area to the left of the trekkers hut. The trekker’s hut is a pretty long wooden building that has four rooms – enough space to house more than 20 trekkers. Alternatively, trekkers can stay at the Forest Rest House slightly uphill.
Spend some time exploring Tshoka. Slightly uphill are the cafes where trekkers can try the local malt beer Tumba. Ask the café owners for the keys to the monastery.
Follow the trail as it leads out of Tshoka, cross the small wooden bridge over the pond and head to the monastery. It is a quiet place worthy of a quick visit. There are just a handful of Tibetan families living here.
What will take your breath away is the view of the snow-clad peaks of the Kangchenjunga range stretching right behind you – with Mt Pandim dominating the skyline. For most trekkers this is the view of the day. You can climb a little higher to get wonderful panorama shots of the pond and the peaks.
Day 4: Tshoka to Dzongri via Phedang
- Altitude: 9,701 ft (2,957 m) to 12,083 ft (3,683 m) to 13,024 ft (3,970 m)
- Time taken: 5-6 hours
- Trek gradient: Difficult. 30 minutes of steep climb followed by a gradual ascent, after which the trail again climbs steeply for 20 minutes to reach Phedang. 1 hour ascent from here followed by a gentle descent brings you to Dzon
- Water sources: Carry 2 litres of water from Tshoka since it will be difficult to find a source on the trail.
Like yesterday, climb up to the little pond leading to the monastery, and then follow the trail that runs to its right. The trail begins to climb sharply and within minutes Tshoka is a tiny hamlet below you. Red rhododendron trees spring up everywhere. If you are in season when the flowers bloom (May 1st/2nd week), then the entire slope lights up with a fiery red colour. After a stiff climb for about 30 minutes, the trail evens out to a gradual climb.
The trail changes to one paved over wooden logs. It is a delight with rhododendrons fanning the path. Little wooden benches line on either side of the trail – which makes the trail look like it is in a park. Sometimes mist filter in surreally through the rhododendron trees. Even in this magical setting the trail climbs throughout and trekkers feel the altitude. The log path gives way to a regular stony trail that climbs quickly to Phedang in 20 minutes.
Phedang, at 13,000 feet, is a large clearing with superb views of the snow-clad mountains. A log hut and a few wooden benches dot the landscape. Stop here for lunch and a well-deserved rest. The trail forks at Phedang with one that goes right, leading to Kockchurang. Water is available from a spring slightly lower on the trail to Kockchurang. The spring is 10-15 minutes away on a lower trail.
Take the trail to Dzongri that starts across the clearing. The trail starts to climb immediately along the dwarf rhododendrons that line the slope. The views start getting better with every step, but watch for a few muddy patches on the trail. After a bout of rain, you need to skip your way around them. It is a ridge climb, so the trail switches between the alternating sides of the hill. Watch for the view change between the Pandim ranges and the Kabru. An hour later, the climb tops at a shrine with multitude of prayer flags. This is the highest point of the days trek at 13,080 feet.
Take a brief rest at the shrine and follow the trail that gently descends towards Dzongri. For most parts the trail undulates with the first patches of snow lining the roots of the dwarf rhododendrons around you.
The Dzongri trekkers hut appears suddenly at the bend in the trail. A gentle clear stream runs by the side of the hut. There are plenty of camping grounds around Dzongri but the hut itself can take in 30 trekkers at a time.
Dzongri is a welcome sight for trekkers after the hard climb from Tshoka. At 12,980 feet trekkers feel the affect of altitude at the Dzongri meadows. Dzongri is a large cauldron, mostly meadows, surrounded in all directions by the mighty peaks of the Kanchenjunga range. In every direction is a snow peak to be looked at and admired. For most trekkers Dzongri is a reward on its own. Many finish their trek at Dzongri and head back the way they came.
Day 5: Dzongri to Dzongri Top. Rest day at Dzongri
- Altitude: 13,024 ft (3,970 m) to 13,778 ft (4,203 m)
- Time taken: 45 minutes climb to Dzongri Top
The day starts with a climb to Dzongri top. Dzongri top i.e at 13,778 ft, is the highest point from where you get the 180 degree panaromic view of the mighty peaks of the Singalila and Kanchenjunga ranges.
Dzongri top is a two hill climb from the Dzongri trekkers hut. The trek from Dzongri to Dzongri top takes about 45 mins. The sun rises at 5 am and you don’t want to miss seeing the first rays of sun hitting Kangchenjunga. Start your trek at 4.00 a.m with torch lights and you reach the top just as the dawn breaks.
Dzongri top is a two hill climb from the Dzongri trekkers hut. The trek from Dzongri to Dzongri top takes about 45 mins. The sun rises at 5 am and you don’t want to miss seeing the first rays of sun hitting Kangchenjunga. Start your trek at 4.00 a.m with torch lights and you reach the top just as the dawn breaks.
Spot Thansing, the destination for the next day, Lamuney and Goechala peaks below you. On the other side, the green rhododendron slopes extend for miles.
Retracing your path to Dzongri takes 20 mins.
Day 6: Dzongri to Thansing via Kockchurang
- Altitude: 13,024 ft (3,970 m) to 12,152 ft (3,704 m) to 12,946 ft (3,946 m)
- Time taken: 5-6 hrs
- Trek gradient: Moderate. Gentle descent for about 2 hours followed by a steep descent to Kockchurang. Continuous ascent from here to Thansing.
- Water sources: Carry 2 litres of water from Dzongri. The only water source on the way where you can refill your water bottles will be at Kockchurang.
- In half an hour, rhododendron shrubs occupy the slopes again. The gentle to medium descent continues over 2 hours. The rhododendron shrubs suddenly give way to rhododendron forest. The descent becomes steep and you lose more than 500 ft. The forest is a good place to spot birds. Walk through silently and spot birds camouflaged in the browns and greens of the forest.Kockchurang springs up at the end of the descent. Just there, find a route through the forest going right. It goes to Phedang. Kokchurang has a trekker hut but no real place to pitch tents. The Prekchu river flows next to the trekker hut 50 meters away. By the banks of the river, amidst the rocks, 4-5 tents can be pitched. The small campsite though feels lovely. In the evening, expect mist hanging over the river and the tents enveloped in the mist with the sound of the fast river below makes it a great camping experience.
The trekker hut at Kokchurang has two big halls on the sides capable of handling 10-12 trekkers each and a central hall which can serve as the cooking area.
From Kokchurang, walk down to the bridge across Prekchu. Spend some time on the bridge experiencing the cool breeze of the river. The water below looks icy blue. On the other bank, you have the rhododendron forest again. They flower in June but at any time, the moss lined trees with their branches spreading out in all directions make it a fairy tale walk. There is a trekking trail but no lined path. The gradient increases and it is an ascent through out. The distance between the bridge and Thansing is 2kms. By midway forests end and the landscape becomes rocky and barren. At the end of the climb is Thansing– a big meadow. There is a dilapidated trekker hut at the entrance of the flat meadow. The hut can be used as a kitchen but tents would be needed to stay. The open meadow can host any number of tents. You are right in front of Pandim and the left wall of Kangchenjunga here. Thansing can be cold in the night.
Day 7: Thansing to Lamuney
- Altitude: 12,946 ft (3,946 m) to 13,743 ft (4,189 m)
- Time taken: 2 hours
- Trek gradient: Easy. Gradually ascending trail which suddenly becomes steep towards the end as you approach Lamuney.
- Water sources: Carry sufficient water from Thansing. You will not require a refill since it’s a short trek today.
You may choose to trek further to Samiti lake and spend an hour there. The trail ascends from Lamuney and it is a 45 minute stiff climb to the Samiti lake. Notice the terrain being rocky all through the ascent. The climb suddenly flattens out and the deep blue waters of the lake come into the picture. Move closer to the shore of the lake and the blue does not change. If it is windy, the lake has waves too. Take a walk around the lake and sit beside its serene waters. The Samiti lake shores are home to mountain goats and blue birds which you are most likely to spot.
Day 8: Lamuney to View Point 1 and back to Kockchurang/Thansing
- Altitude: 13,743 feet (4,189 m) to 15,100 ft (4,602 m) back to 12,152 ft (3,704 m)
- Time taken: 12-14 hours
- Trek gradient: Moderate. Continuous ascent of 2 hours to reach view point 1.
- Water sources: Stay well hydrated and carry 2 litres of water before beginning the summit climb as well as before the descent to Kockchurang/Thansing. There will be no water source on either stretch.
This is the longest day of the trek and so start your day really early at 3 am to give you multiple advantages.
– A 3 a.m start ensures that you reach the first view point or the sunrise point right in time to see the first run rays hitting Kangchenjunga.
– It also makes it easier to walk on the moraines that you find after the sunrise point as the snow is still hard.
– The probability of getting good views are higher in the mornings.
– Lastly gives you enough time to spend at View Point One and return to Samiti by 8 am, where you get some more time.
The trail to View Point One is a moderate ascent. You can break up the ascent into two sections. One, up to Samiti Lake and the next to View Point One.
The highlight of this day would be the spellbinding view of the sun rising on the Kanchenjunga range. The soft alpenglow on the mountain top is a sight that will say etched in your mind.
Next, the early morning reflection in the Samiti Lake. This crisp reflection of the surrounding mountains is something photographers should look out for. Try and time yourself to reach Samiti by 8 am while returning from View Point 1. This should allow you a good one hour to spend time by the lake side.
From there, retrace your steps back to Kockchurang / Thansing.
Day 9: Kockchurang to Tshoka
- Altitude: 12,152 ft (3,704 m) to 9,701 ft (2,957 m)
- Time taken: 6-7 hours
- Trek gradient: Difficult. Relatively flat trail to Phedang for about 4 hours followed by descent to Tshoka.
- Water sources: Stay well hydrated and carry 2 litres of water from Kockchurang since there is no water source on the trail today.
Take the diversion to the left inside the forest instead of climbing up to Dzongri. The trail remains mostly flat with small descents and ascents only to switch between mountains. Rhododendron trees line your way all along and the Prekchu flows below. Look left and at a number of places you get lovely views of Mt. Pandim and its neighbours. Phedang is 10 kms away and this is one of the longest trails between two known campsites. It takes about 4 hours to reach Phedang.
The first phase is new and interesting. The trail goes on the flank on the mountain all along and you move from one mountain to another to another maintaining a constant altitude of 12,000ft all along. Kokchurang, Phedang and most of the trail, are all at 12,000ft!
From Phedang you retrace the descending trail to Tshoka. The days trek takes about 6-7 hours on an average.
Day 10: Tshoka to Yuksom via Bhakim and Sachen
- Altitude: 9,701 ft (2,957 m) to 8,654 ft (2,638 m) to 5,643 ft (1,720 m)
- Time taken: 6 hours
- Trek gradient: Moderate. Continuous descent to Sachen, followed by an undulating trail to Yuksom.
- Water sources: Carry sufficient water from Tshoka. You will cross a few streams where you can refill your water bottles.
Retrace your way from Tshoka to Yuksom. Its much faster and easier than your trek up. Sachen comes up quickly being a pure descent. From Sachen the trail goes up and down generally losing altitude. The last stretch has a few climbs which makes you wonder but its soon over and you find yourself back in the friendly Yuksom neighbourhood.
Day 11 :Yuksom to NJP
Leave Yuksom early morning and reach NJP by 4.00 – 5.00 pm.
Foreigners on the Goechala trek
Foreigners must reach Yuksom, the base camp, 1 day before the regular reporting of the batch. This is required to obtain the foreigner trek permit from Gangtok. This is a Government of Sikkim requirement. The permit costs Rs.2,000. This amount is to be handed over to the Indiahikes representative at Yuksom, who will get the permit issued.
Foreigners have to register for the trek in a group of 2 and above.
- The ILP (Inner line Permit or Sikkim permit) for foreigners. Check this link for more details – http://sikkim.nic.in/homedept/ilpfaqs.htm. You can obtain these outside the Bagdogra airport or at the checkpost before entering Sikkim from Silguri. This has to be obtained by the trekkers.
- Trek permit for all trekkers – Obtained at the forest check post at Yuksom. Fee varies for students (id card required), regular Indian citizens (id proof required) and foreginers.
- Special trek permit for foreigners: Foreigners need to obtain a special permit at Gangtok to trek in Sikkim. Indiahikes can help you obtain this permit. Kindly reach Yuksom a day before the trek batch starts. The charges of obtaining the permit will be Rs.2 ,000 per person and has to be paid to our representative who will meet you at Yuksom.
- Citizens of China, Myanmar and Bangladesh are not permitted to trek in this area.
Citizens of China, Myanmar and Bangladesh are not permitted to trek in this area.
Click here to read blogs on the Goechala trek!
Sort_itinary:-
Day 1: Reach Yuksom; 6-8 hours drive from NJP. Transport from NJP will be arranged at 9.30 am. Cost of cab – Rs.5,500 per vehicle.
Day 2: Yuksom (5,643 ft) to Bhakim/Sachen (8,654 ft); 5 hours
Day 3: Bhakim (8,654 ft) to Tshoka (9,701 ft); 4 hours
Day 4: Tshoka (9,701 ft) to Dzongri (13,024 ft) via Phedang (12,083 ft); 6 hours
Day 5: Acclimatisation Day. Dzongri (13,024 ft) to Dzongri top (13,778 ft) and back to Dzongri; 3 hours
Day 6: Dzongri (13,024 ft) to Thansing (12,946) ft via Kockchurang (12,152 ft); 6 hours
Day 7: Thansing (12,946 ft) to Lamuney (13,743 ft); 2 hours
Day 8: Lamuney (13,743 ft) to View Point One (15,100 ft) via Samiti Lake, back to Kockchurang / Thansing (12,152 ft / 12,946 ft); 12 hours
Day 9: Kockchurang / Thansing (12,152 ft / 12,946 ft) to Tshoka (9,701 ft); 6-7 hours
Day 10: Tshoka (9,701 ft) to Yuksom (5,643 ft); 6 hours
Day 11: Drive from Yuksom (5,643 ft) to NJP. You will reach NJP by 5 pm.
Please note that you will be staying at a guest house in Yuksom. The stay on all other days is in tents (3 per te
It is mandatory for trekkers to carry a copy of their photo id for entry at forest check posts on the trek.
Get yourself fit/Fitness Parameter:-
How to get fit for the Goechala trek
Goechala has been graded as a difficult trek. On most days, you are covering 20 kms in high altitude. Trekking for 20 kms each day with a backpack on can tire out even the most hardy trekkers. This trek demands you to be in your top physical condition.
Cardiovascular endurance – Target 10 km in 60 minutes before the start of the trek
On Goechala trek, you are trekking an average of 20 km each day in a terrain that is not too friendly. On the first three days of the trek, you have to cover an average of 11 km every day, gaining a good amount of altitude. That’s a long distance to cover, with steep ascents. This requires a good amount of endurance and stamina. You can begin by jogging everyday. Start slow and increase your pace everyday. Swimming, cycling and stair climbing without too many breaks in between can help too.
In order to be prepared for a high altitude trek, you should have a combination of distance and speed targets.
Here’s a fitness routine that works:
In case you’re just starting with a regular fitness routine, phase out your distance targets in the following manner –
–>Target completing 5 km in 35 minutes when you begin.
–> Gradually increase your pace by running 4 times a week and bring it down to 5 km in less than 35 mins.
–>If you are above 45 years and is comfortable with brisk walking, then target covering 10km in 90 minutes.
If you are somebody you prefers cycling over running, then try to cover 22 km in 60 minutes.
How to send us a proof of your fitness routine?
Record your run on an app like Nike Run. Start recording your run when you start running. At the end of your run, hit the stop button.
Take a screenshot of the summary of your run. We will need a detailed split of each kilometre of your run. This is usually integrated in all running apps.
Note: Make sure your GPS is on when you record your run. If the GPS is off, we will not accept the screenshot.
Upload two screenshots 10 days prior to the start of the trek — one of you covering 5km in less than 35 mins along with your picture and the other with splits of your run.
Strength – Target 4 sets of squats with 20 in each
This is an important area you need to work on. At the end of this trek, you would have completed a 100 kms in 6 trekking days. For a trek like this, you must strengthen your core muscles. To strengthen your legs, start with 3 sets of squats with 15 squats in each set and work towards reaching your target in 3 weeks.
Flexibility
Flexibility determines the amount of movement your bones can make in any direction around joints such as shoulders, elbows, hips and knees.
It is an aspect that will help you trek comfortably. Stretching your hamstrings, quadriceps, hip flexors and lower back muscles regularly,
promotes relaxation in the tissues reducing the strain on your back. On your trek, it is important that you arrive on the slopes with your muscles relaxed. Carrying a backpack, however light, for a 100 kms trek can become a strain. These exercises will help you to be in good shape before the trek.
Also consider HIIT training regime for a trek like this one.
Things to take/Essential things to take:-
What to take on the Goechala trek
Click here to buy trek equipment.
Bare necessities
- Trekking shoes: For this ten day long trek you need trekking shoes with good grip that won’t wear out. You can watch this video to help choose the right trekking shoes.
- Backpack (40-60 litres): A backpack with sturdy straps and a supporting frame. Rain cover for backpack is essential.
Clothes
On a trek, carry fewer clothes than you would normally need. Do not pack for ‘what if situations’. That will only add to the weight of your backpack and not be used on the trek. Once your clothes get warmed up on a trek, you will not feel like changing. Just maintain personal hygiene.
- Three warm layers: You experience strong cold winds especially in the months of September and October. You will need at least three warm layers (two lights layers such as fleece and woolen and one padded jacket) for this trek.
- Three trek pants: Wear one pair and carry two pairs. Denim/jeans and shorts are not suitable for trekking.
- Three collared t-shirts: Carry light, full sleeved t-shirts that prevent sun burns on the neck and arms. Again, wear one and carry one. Let one of these be a dri-fit t-shirt. It will dry quickly in case you are trekking on a rainy day. A common mistake that trekkers make is not changing their tshirts often enough. Regardless of how cold it is, the body tends to sweat a lot. Trekkers who don’t change to fresh clothes after reaching the campsite fall ill due to wet clothes and are often unable to complete their trek.
- Thermals (Optional): Those who are more susceptible to cold can carry thermals to wear at night.
Accessories
- Sunglasses: Sunglasses are to prevent snow blindness. These are more important in April and May. There might be snow at the upper campsites regardless of the season. So carry a pair of sunglasses.
- Suncap: The sun is intense at higher altitudes and a sun cap is absolutely essential to keep your face and neck safe from sun burns.
- Synthetic hand gloves: One pair of fleece or woolen hand gloves. One pair of water proof gloves.
- Balaclava: You may use woolen scarves instead as well.
- Socks (2 pairs): from two sports socks, you can take a pair of woolen socks for the night.
- Headlamp/LED torch: Mandatory
- Trekking pole: Watch this video to understand why you need a trekking pole.
Others
- Daypack (20 litres): If you are offloading your backpack, you will need a smaller backpack to carry water, medical kit and some light snacks.
- Toiletries: Sunscreen, moisturiser, light towel, lip balm, toilet paper, toothbrush, toothpaste, hand sanitiser. Do not carry wet wipes since these are not biodegradable. If you do happen to use wet wipes to clean up after a trek, make sure you bring them back with you. The same holds for used sanitary napkins. Carry a zip lock bag to put used wet tissues and napkins. Bring this ziplock bag back with you to the city and do not dispose wet tissues and sanitary napkins in the mountains.
- Cutlery: Carry a spoon, coffee mug and a lunch box. We insist on trekkers getting their own cutlery for hygiene reasons.
- Two water bottles: 1 litre each
- Plastic covers: While packing, use plastic bags to compartmentalize things and carry few extra plastic bags for wet clothes.
Mandatory Personal Medical Kit
- Diamox – 10 tablets (to prevent AMS)
- Diamox – 10 tablets (to prevent AMS)
- Nifedipine – 5 tablets
- Crocin – 6 tablets (fever)
- Avomine – 4 tablets (motion sickness)
- Avil 25mg – 4 tablets (allergies)
- Combiflam – 4 tablets (Pain killer)Norflox TZ & Lomofen– 6 tablets each (diarrhea)
- Norflox TZ & Lomofen– 6 tablets each (diarrhea)
- Digene – 10 tablets (acidity)
- Omez/ Rantadine – 10 tablets (antacids)
- Crepe bandage – 3 to 5 meters
- Gauze – 1 small roll
- Band aid – 10 strips
- Cotton – 1 small roll
- ORS – 10 packets
- Betadine or any antiseptic cream
- Moov spray (aches, & sprains)
- Knee cap, if you are prone to knee injury
- Anti fungal powder
Mandatory Documents
Please carry the below documents. Documents need to be downloaded (PDF), filled in, signed and handed over to the trek leader at the base camp. Please note there is no facility to get print outs and photocopies at Yuksom.
Indians:
- Original and 3 photocopies of government photo identity card
- 3 passport size photos
- Original and 3 photocopies of Medical Certificate (first part to be filled by a doctor and second part by the trekker) – Download PDF
- Original and 3 photocopies of Disclaimer form (to be filled by the trekker) – Download PDF
Foreigners:
- Original and 4 copies of ILP
- Original and 4 copies of passport
- Original and 4 copies of visa
- 4 passport size photos
- Original and 4 photocopies of Medical Certificate (first part to be filled by a doctor and second part by the trekker)
- Original and 4 photocopies of Disclaimer form
Map & gettings there/Map:-
How to get to the basecamp – Yuksom
Delhi → NJP Railway Station → Yuksom
The Goechala trek starts from Yuksom. Yuksom is a nice quaint hill station and for those who want to avoid the hustle bustle of Darjeeling. Yuksom is 85 km away from Darjeeling.
Indiahikes will organise transport from New Jalpaiguri to Yukson. Pick up will be from NJP Railway Station at 9.30 am on Day 1. The cab cost will be Rs.5,500 per vehicle. This is not included in the trek fee. It is to be shared amongst trekkers and paid directly to the driver.
You will reach Yuksom at around 5.00 pm.
To reach Sikkim
From Delhi
- North East Exp — Train No 12506 (Departure – 6.45 am; Arrival at NJP – 8.20 am)
- Brahmputra mail — Train No 14056 (Departure – 23.40 pm; Arrival at NJP – 4.55 am the next day )
From Kolkata [Howrah]
- Kamrup Exp — Train No 15959 (Departure -17.35; Arrival -6.15 am)
- Uttar Banga Exp — Train No 13147( Departure – 19.35; Arrival -7.00 am)
- Darjiling Mail — Train No 12343 (Departure – 22.05 ; Arrival – 8.00 am)
- KanchanKanaya Exp — Train No 13149 (Departure – 20.30 ; Arrival – 7.30am)
Getting back
Yuksom → NJP Railway Station → Delhi
Indiahikes will arrange for shared cabs to drop trekkers to NJP railway station The transportation cost from Yuksom to NJP is additional, to be shared among trekkers and paid directly to the driver. The approximate cost per shared cab is Rs.5.500/- Expected arrival time at NJP is 5.00 pm. Book train/flight tickets for your onward journey for late in the evening.
Safty:-
What are the risks on the Goechala Trek?
The Goechala trek is a moderate-difficult one. And with every tough high altitude trek comes a flurry of risks – altitude sickness being the biggest risk. At Indiahikes, we pay utmost importance to safety of trekkers. While we do our bit to ensure a trekker’s life is safe, we also expect any trekker who is enrolling with us to know what could go wrong, and if it does, how to tackle it.
What Indiahikes does to ensure your safety:
Our philosophy is simple. We ingrain safety aspects in the people we work with, in the processes that we follow and in the equipment we carry. All our trek leaders are trained repeatedly on safety issues and protocols. Most issues are resolved with their intervention.
But we strongly advocate the statement,”Prevention is better than cure.” Right from the time you decide to register for the trek till the last day of the trek, these safety procedures will be running in the background. We have listed a few of them below.
1. Fitness criteria before registration
Over years of organising high altitude treks, we have found that safety issues thrive amongst those who are unfit and unprepared for the trek. So we have introduced an eligibility criteria for the Goechala trek. Anyone who wants to register for the Goechala trek has to meet the fitness requirements, with the ideal BMI. The BMI and fitness regime will require proof. A high altitude trek is not to be taken casually, especially something as difficult as Goechala.
2. Acclimatisation day at Dzongri
The fourth day’s trek to Dzongri involves a huge altitude gain and it takes time for the body to acclimatise to this altitude. So we have an acclimatisation day at Dzongri, so that your body gets a day’s rest before exerting further. Often, rest can be the biggest boon on high altitude treks to avoid AMS.
3. Monitoring health on a trek
On the Goechala trek, your Trek Leader will be monitoring two aspects thrice a day.
- Oxygen Level
- Pulse Rate
Your Blood Pressure levels will be checked once a day.
This will help us ensure that your body is acclimatising as required. Any abnormal reading will be paid special attention to and action will be taken immediately.
Every trekker will be given a Health Card at the beginning of the trek. The Health Card is issued to monitor the trekker’s daily health, wherein he will be entering details about his health everyday. It also contains details of what symptoms he should look out for and what action he should take during emergencies. These Health Cards will be taken back at the end of the trek.
4. High Altitude Medical Kit
Your trek leader will also be carrying a full-fledged high altitude medical kit. This will include basic medicines and specific medicines catering to altitude sickness – Diamox, Dexamethasone (tablets and injections) and Nifedipine. Your Trek Leader will also be carrying a portable oxygen cylinder throughout the trek. In addition to that, there are oxygen cylinders installed at all high campsites for any emergency situations.
5. High Altitude Trek Equipment
To ensure safe trekking on snowy terrain, Indiahikes will provide you with micro-spikes to attach to your shoes. This will give you good traction on hard snow. To avoid snow from entering your shoes, Indiahikes will provide you with gaiters that you can put on over your shoes. You will have qualified technical guides with you, who will lead the way on difficult terrain, where there might be too much scree or moraine.
All our sleeping bags and tents are custom-made for high altitude. If it is cold outside, it will be around 10 degrees warmer inside the tent. The sleeping bags can withstand temperatures up to -10 degree Celsius.
6. Being hydrated and well nourished on the trek
You need to drink a minimum of 4 litres of water every day during the trek to ensure that you’re well hydrated. De-hydration on a trek can make you lose energy very quickly and intensify the effects of AMS. Your trek leader will brief you about the amount of water that you need to carry with you at the start of each day as well as water sources on the trail.
We provide trekkers with nutritious meals to ensure that they are energized to complete the trail each day. Apart from this, snacks or packed lunch is provided wherever the trail before a meal break is likely to be long. Make sure that you do not skip any meal as this can lead to serious health emergencies on high altitudes.
With all these processes and equipment in place, you can be rest assured that you will have a safe trek with Indiahikes.
Nevertheless, you will need to be cautious and report the slightest of symptoms to your trek leader as soon as you feel them.
What you compulsorily need to know if you’re going on the Goechala trek
If you have registered for this trek, then here is some information that you must know in order to have a safe trek. At Indiahikes, we believe that as long as you are well-informed and well-prepared, you can survive easily at high altitude.
First thing you should know is that Goechala is a Very High Altitude trek. It climbs up to an altitude of 16,000 ft. So it comes with its fair share of risks – altitude sickness, lack of easy exit points, unfriendly terrain and extreme altitude gain.
Acute Mountain Sickness (AMS)
AMS is one of the biggest dangers on a high altitude trek such as Goechala. AMS occurs when your body isn’t acclimatising to its surroundings. It can accelerate very rapidly, so it is important to identify the symptoms as soon as you see them. Before you read further, watch this video to understand the symptoms of AMS.
Where on the Goechala trek is AMS likely to affect you:
Over years of conducting the Goechala trek, we have noticed that there are some campsites where trekkers are most prone to be hit by AMS. Let’s take you through the trek so that you know where it is likely to occur and what precautions you can take.
On the first two days of the trek, at Yuksom and Bhakim, it is safe to say that you will not experience any symptoms. They are at fairly low altitudes, with Bhakim just touching the border of high altitude (8,630 ft)
On the third day, at Tshoka, a few trekkers begin to feel queasy. Tshoka is at an altitude of 9,650 ft, which is relatively low compared to the rest of the trek. If you’re hit by AMS at any point on the trek, Tshoka would be the ideal campsite to descend to.
On the fourth day, you climb from Tshoka to Dzongri, that is 9,650 ft to 12,980 ft. Dzongri is the biggest playground for AMS. Around 25% of the trekkers complain of headache and fatigue upon reaching Dzongri.
What to do if you feel symptoms of AMS at Dzongri
If you feel any symptoms of AMS on the trek, you must report to the Trek Leader immediately. Do not wait till the end of the day’s trek. Do not try to handle it yourself either. Our Trek Leaders are well-trained and experienced to handle any cases and they will be the decision makers in any such cases.
Watch the video below to understand how to treat and prevent AMS. The information in this video is rare to find. With this knowledge, you can probably save your own life or another’s trekkers life.
As a first step, your trek leader will run you through the Triple One Test – One Disprin, One litre of water and One hour of rest. If you’re suffering from dehydration, this will solve the problem and you will be fine in one hour. If the symptoms don’t go away, then he’ll begin to treat you for AMS, perhaps with a course of Diamox. If you’re already on a course of Diamox, your trek leader is likely to increase the dosage. The increased dosage of Diamox usually takes care of the Acute Mountain Sickness. In addition to that, the acclimatisation day at Dzongri helps trekkers get enough rest before gaining more altitude. We have noticed that around 90% of the trekkers get acclimatised by the end of the acclimatisation day.
If you’re not at your 100% at the end of Day 5, then again, report to your Trek Leader. He will make you descend to Tshoka, where you will be fine. This is the only campsite where exit is possible quickly because Tshoka is the previous campsite. After you cross Dzongri, exit becomes extremely difficult. The next campsite is Thansing. Coming down from Thansing involves a 10 km flat walk above 12,000 ft till Phedang and then a descent to Tshoka. By the time you cover the 10 km at an altitude above 12,000 ft, AMS can escalate and turn into HAPE or HACE.
After Dzongri on Day 6, Thansing is the next danger zone. The campsite is at an unfriendly attitude of 13,693 ft. Although you are given a day in between Dzongri and Thansing to acclimatise, you might feel the weight of the altitude bearing down on you.
If you face any of the symptoms of Acute Mountain Sickness, don’t take them lightly. Report them to your trek leader immediately.
If Diamox alone doesn’t work, he might administer Dex or Nifedipine, or perhaps oxygen, depending on the circumstances.
Especially on the Goechala trek, AMS is very common. While AMS can be treated with medicines for the most part, the symptoms must be recognised before it can go to advanced stages – High Altitude Pulmonary Edema (HAPE) and High Altitude Cerebral Edema (HACE).
HAPE and HACE are critical conditions that can be fatal within hours. And they can occur without AMS preceding them. So it’s doubly important to recognise any symptoms and nip them in the bud.
Exit points on the Goechala trek:
The safest point on a trek where a trekker can descend to and rest is considered an Exit Point. On the Goechala trek, exit is extremely difficult. The ideal campsite to descend to would be Tshoka (9,650 ft), and if possible all the way down to Yuksom (5,700 ft). There are no exit points after Tshoka.
It could take more than a day’s trek to reach the closest road head (Yuksom), whereas any affected trekker should be brought to lower altitudes within a few hours. Descent is the single most effective cure for AMS, HAPE and HACE, and unfortunately, it is difficult on the Goechala trek after one point. So the only solution is to be very vigilant.
Closest hospital:
For any advanced treatment, Geyzing is the closest well-equipped hospital in the area. It is a 90 minute drive from Yuksom. Vehicles will be available at Yuksom.
Why you should personally know about the risks and precautions of high altitude treks
If ever you find yourself alone at high altitude, either while trekking independently or with another organisation, there are some life-saving steps you can take. Firstly, you should be able to recognise symptoms of altitude sickness. So acquaint yourself with the symptoms.
Secondly, there might be instances when you have to administer medicines to yourself or to a fellow trekker.
If you are trekking independently then you need to know when exactly to administer these medicines and in what dosage.
The video below will help you understand what medicines to administer when and how much. Sandhya UC, partner at Indiahikes, explains in detail about HAPE and HACE. Here, you can learn about the advanced symptoms are and how to tackle them.
It is a myth that fit and experienced people are not affected by Acute Mountain Sickness
If you’re of the opinion that fit people don’t get AMS, please get rid of that notion right away. AMS can affect anyone without paying heed to their fitness and prior experience at high altitude! Altitude sickness does not distinguish between a first timer and an experienced trekker.
For more detailed information about Acute Mountain Sickness, you can download and study the manual below.
Cancelation policy/Terms & Cancelation Policy:-
What you need to know about the trek fee
The trek fee of Rs. 16,650 + 5% GST covers all costs of the trek from Yuksom to Yuksom.
Here is what the trek fee includes:
- Accommodation – Stay is included from Day 1 to Day 10 (Yuksom to Yuksom). You will be staying in a lodge at Yuksom and camping on remaining days of the trek (3 per tent).
- Meals – All meals from dinner at Yuksom on Day 1 to breakfast at Yuksom on Day 11 are included. We provide simple, nutritious vegetarian food on all days of the trek.
- Camping charges – All trekking permits and forest camping charges are included.
- Trekking equipment – You will stay in high quality tents and sleeping bags in all the camps. Our high altitude sleeping bags can withstand temperatures as low as -10 ºC. We provide ice axes, roped, micro spikes, gaiters etc. as required.
- Safety equipment – First aid, medical kit, oxygen cylinders, stretchers etc. will be available at all campsites to deal with emergencies.
- Services of an expert Trek Leader – All our trek leaders are qualified in basic / advanced mountaineering courses.
- Services of an expert Trek Team – The mountain staff on this trek consists of well trained guides, cooks, helpers and porters.
Here is what the trek fee excludes:
- Transport to and from the base camp – We will arrange shared taxis for trekkers to pick you up from New Jalpaiguri Railway station and drop you back from Yuksom. This will cost approx. Rs. 5,500 per 5-6 seater vehicle one way. You will have to share this cost with the other trekkers
- Food during transit to and from the base camp – The trek fee does not include meals purchased during the journey to and from Yuksom.
- Backpack offloading charges – If you wish to offload your backpack, there will be an additional charge of Rs. 2,475 + 5% GST. The backpack cannot weigh more than 9 kg. Suitcases/strolleys/duffel bags will not be allowed. Please note that charges will vary for last minute offloading in case you decide to offload your bag after reaching Yuksom (Rs.375 per day inclusive of taxes). Online offloading in advance is possible up to two days prior to the trek start date.
- Stay at New Jalpaiguri on the last day
- Personal expenses of any kind
- Anything apart from inclusions
Terms & Conditions
1. Cancellation: If a trek is called off at the last moment due to a natural calamity/unforeseen circumstances (like rains, earthquake, landslides, strike, bandh etc), Indiahikes will issue a trek voucher for the full amount. The voucher can be redeemed for the same trek or another trek in the next one year.
In case, you wish to cancel your trek, please login to your account and cancel. Cancellation requests will not be taken over phone or email.
The cancellation charges are as under.
- Cancellations prior to 30 days from the start of the trek — full refund.
- Cancellation between 30 days and 20 days to the start of the trek — 50% refund.
- Cancellation less than 20 days to the start of the trek — no refund
Please note: In case of refund, there will be a deduction of 4% (bank charges) from the total fee you have paid. Also, if you have opted for a trek insurance, the amount will not be refunded.
2. The trek fee includes all costs of the trek from the start of the trek at Yuksom to the end of the trek at Yuksom.
3. Pick up: Trekkers are picked up from NJP railway station by 9 am. Usually, trekkers are clubbed together with other participants to make a group. The group travels together to the base camp-Yuksom in shared cabs.
4. Transport: The transport is arranged in shared cabs. Transport from NJP to Yuksom and return from Yuksom to NJP can be arranged by us at an extra cost Rs 5,500 per 5-6 seater vehicle one-way. Participants are expected to share the cost likewise. The amount is to be paid directly to our transporter. No service tax is applicable on transport cost. Indiahikes only arranges the vehicle pick up and is not responsible for any issues during transport.
5. Backpack carrying: Indiahikes expects all trekkers to carry their own backpacks. All common gear will be carried by the support team. If for some reason a trekker is unable to carry his or her backpack, he/she can offload the same by paying an additional charge.
Backpack offloading charges will be Rs 2,475* + 5% GST. Charges for last minute offloading during the trek will be Rs. 375 per day inclusive of tax. The backpack cannot weigh more than 9 kg. No suitcases/strolleys/duffel bags will be allowed.
Online offloading in advance is possible up to two days prior to the trek start date.
6.Emergency during trek: In a trek a medical emergency or any other emergency may arise. If for any reason you are sent down from the trek then Indiahikes will make arrangements for your return to the base camp or nearest road head. A staff will accompany you. He may not be a trained personnel.
Evacuation or dealing with emergencies is extremely difficult in the mountains. It is time consuming as well. A normal trek of 2 hours may take 6 hours in an emergency (a sick person is not easy to evacuate). Doctors do not go along with a team. Doctors are not available at the base camp or nearest road head either. Indiahikes trek leaders are trained to administer first aid and know how to deal with issues related to the mountains. However, they are not doctors.
Registering for this trek is an understanding that you have read up on the difficulties of high altitude trekking and understand the risks. You have also understood what AMS, HAPE and HACE are. You have taken efforts to educate yourself and you are in a position to manage your own altitude related emergency
7. Fitness: A high altitude trek in the Himalayas requires considerable fitness. Your body needs to train itself to process more work with lower levels of oxygen. Cardiovascular training before a trek is critically important. Training must include strength and flexibility workout. We have laid out the eligibility criteria here. Registering for the trek is an understanding that you will undertake the mandated fitness training. Indiahikes has the right to reject candidates who do not meet our eligibility requirement at the base camp.
8. Non-liability: Indiahikes is not responsible for any loss/damage of your gears/equipment or other belongings on the trek.
9. Payment: Payment for the trek can be done online through credit/debit card or net banking. Cheque/draft or cash is not accepted.
10. Safety Protocol:
a. While our itineraries are designed to allow for adequate acclimatisation, most treks in Indian Himalayas climb quickly, which is called forced accents. Unavailability of camp sites and the Indian Himalayan terrain are the reason for this. There are chances that you will feel the effects of altitude sickness and oxygen deprivation while on this trek. Please be aware that your trek leader may deem it unsafe for you to continue trekking at any time, and arrange for you to descend to a lower attitude.
b. Our trek leaders will conduct routine health checks at all camps to measure oxygen saturation, pulse and blood pressure. Indiahikes reserves the right to exclude any trekker from climbing higher on the trek without refund if the trekker’s vital readings are below accepted norms for that altitude. These norms are available with Indiahikes trek leaders.
c. This is a high altitude trek with rough, rocky and snowy terrain. It is important that you are a fit and confident walker in mountain terrain, able to manage ascents and descents by yourself within a reasonable time. Indiahikes reserves the right to turn around a trekker if in the opinion of our trek leader they are unable to complete the itinerary without requiring exclusive assistance. Please realistically self-assess your fitness and suitability for this trek before registering.
Foreigners, please note:
- As per regulations, you need to obtain a special permit at Gangtok to trek in Sikkim.
- Indiahikes can help you obtain this permit. Kindly reach Yuksom a day before the trek batch starts.
- The charges of obtaining the permit will be Rs 2,000 per person and has to be paid to our representative who will meet you at Yuksom.
Permits required:
- The ILP ( Sikkim permit). Check this link for more details
- Trek permit from Gangtok
Documents required:
Original passport + 1 photo copy
- 2-3 photocopies of Inner Line Permit
- 1 photocopy of visa
- 2 passport size photographs